
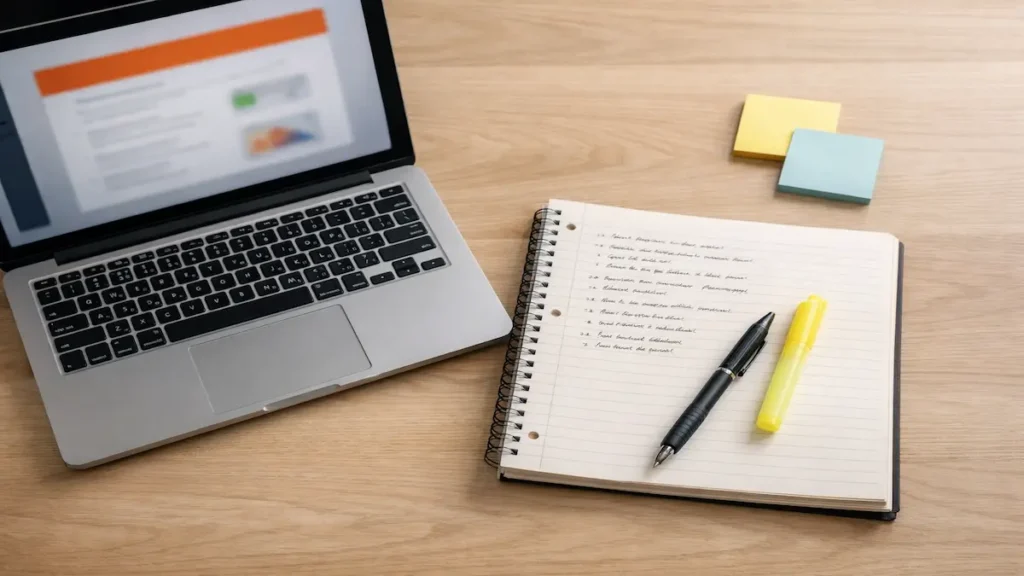
If your “notes” are basically screenshots and panic, you’re not alone. Learning how to take notes from PowerPoint slides is a skill—especially when the professor moves fast, the room is dark, and the slides are dense.
Here’s the goal: slide-based note-taking means extracting the teachable ideas from a slide deck and adding the missing context from what your instructor says, so you can study later without rewatching the whole lecture or rewriting slides word-for-word.
This is for college students who want study-ready notes for exams—without typing every word on the screen.
5) Quick Start box: “If you only have 10 minutes, do this…”
If you only have 10 minutes, do this…
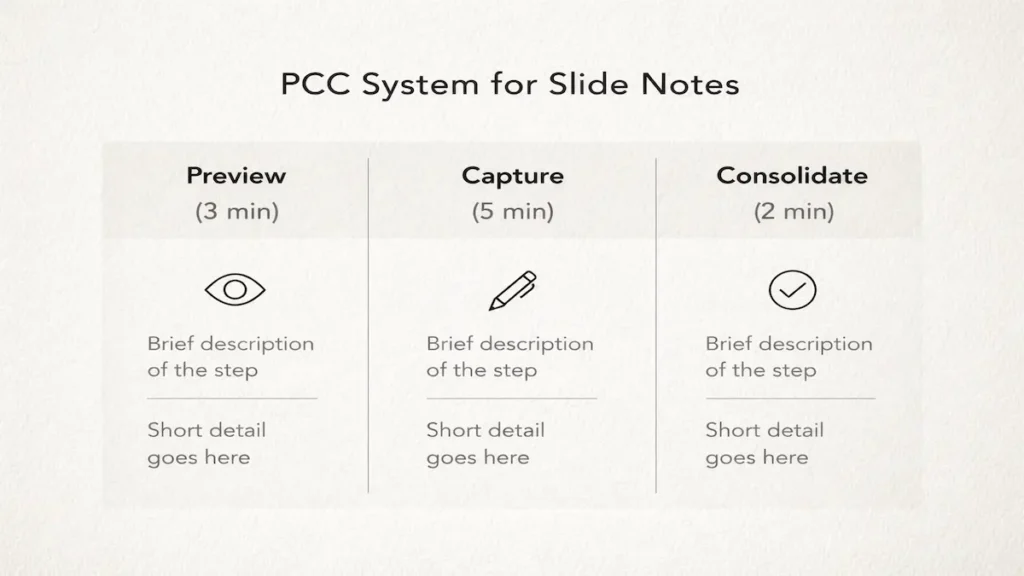
Use the PCC System: Preview → Capture → Consolidate.
Preview (3 min): skim headings and bold terms; write three questions you expect to be answered (a quick form of active recall).
Capture (5 min): in class, write meaning + why it matters + 1 example for each key slide (valid active note taking from slides).
Consolidate (2 min): after class, add a 3-line summary and three quick self-test questions (retrieval practice you can reuse later).
6) Body with H2/H3 sections
How to take notes from lecture slides (Before, During, After)
Mastering the Art of How to Take Notes from PowerPoint Slides
This is the complete PCC System. Do it the same way every time so your brain doesn’t waste energy deciding the “best way to take notes with slides.”
Before class: Preview (set yourself up to win)
Next step: Spend 10–15 minutes before the lecture so the slides feel familiar, not brand new—especially if the slides are posted before class.
Download the file and do a fast skim of titles, diagrams, and summary slides. (If you use a tablet, you can prep for PDF slide annotation too.)
Create a simple page layout to organize lecture notes (template below) and pre-fill the lecture date + topic.
Write 3 “prediction questions” at the top, like:
- “What’s the difference between X and Y?”
- “When would we use this process in real life?”
- “What would show up on a multiple-choice question?”
This short preview sharpens your active listening—and prepares you for later retrieval practice.
During class: Capture (write what the professor adds)
Next step: Aim for clarity over completeness. Your job is to record what you can’t get by staring at the screen later. This is the core of PowerPoint note taking: capture the explanation, not the screenshot.
Use this simple rule per major slide:
Main idea (1 line) + meaning (1–2 lines) + “prof said” (1 line) + example (1 line).
Good things to capture (high-value notes from PPT slides):
- Definitions in your own words (not copied)
- Cause/effect steps (what leads to what)
- “This will be on the exam,” hints (exam-focused notes)
- Confusing diagrams explained out loud
- A worked coding problem the instructor talks through
- Any extra context the instructor adds (what the professor says that isn’t on the slide)
Example Box (what it looks like in your notes)
Slide topic: Operant conditioning
Main idea: Behavior changes based on consequences.
Meaning: Reinforcement increases behavior; punishment decreases it.
Prof said: “Negative reinforcement removes something unpleasant—NOT a ‘negative’ behavior.”
Example: Seatbelt beep stops when you buckle (negative reinforcement).
This is how you turn PowerPoint slides into study notes you can use for spaced repetition later.
After class: Consolidate (lock it in fast)
Next step: Do a 10-minute “finish pass” within 24 hours—ideally before you open TikTok.
Write a 3-line summary: “Today we covered… The big idea was… The tricky part is…”
Add three self-test questions at the bottom (for active recall).
Star anything you didn’t understand and plan one office hours question.
Even short consolidation makes your notes more “exam-ready” than an unedited transcript—and it helps you avoid rewriting slides later.
What to write vs what to skip
Next step: Use this filter: Write what will help future-you answer questions without the slides.
If you’re asking, should I copy slides or take notes, use this rule: don’t copy—translate (meaning + why + example).
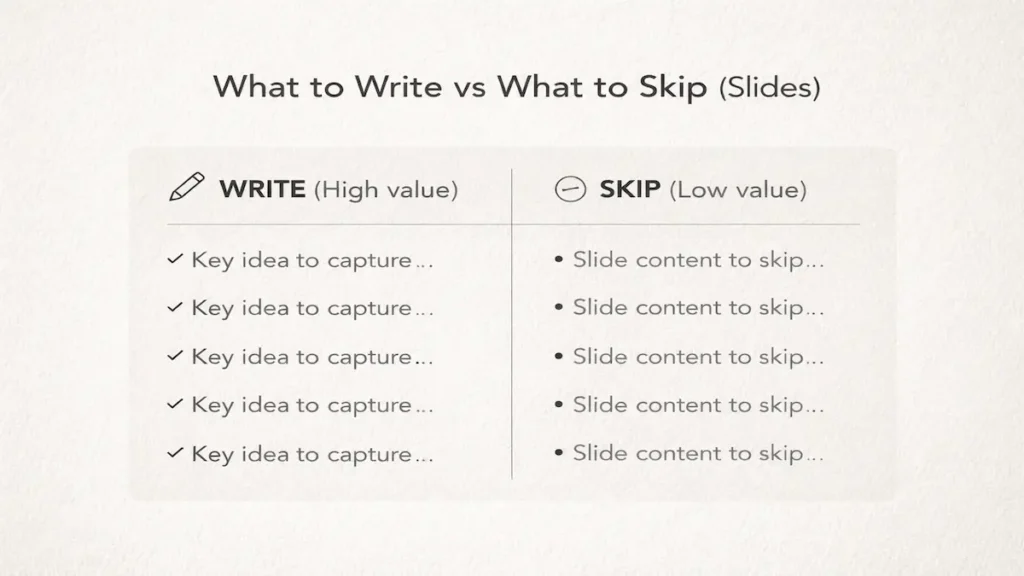
Write (high value):
- The “why” behind a concept (purpose, implication, common trap)
- Steps in a process, with what each step does
- Comparisons (A vs B) and boundary cases (key points vs details)
- Any example the instructor gives (especially a story or real-world scenario)
- A one-line “prof emphasis” note (what they repeated or warned about)
Skip (low value):
- Complete sentences copied from the screen
- Decorative images (unless the instructor explains them)
- Repeated headings and slide numbers
- Long lists you can re-read later with zero confusion
Bullet list to keep you honest (featured-snippet friendly):
- Skip slide titles you already understand
- Skip copied definitions word-for-word
- Skip charts with no explanation given
- Skip “extra reading” footers unless assigned
- Skip anything you can instantly restate from memory
The free template (copy/paste)
Next step: Copy this into Google Docs, Word, Notion, or OneNote and reuse it in every class. This layout helps you convert slides into notes quickly.
Slide Notes Template (PCC-ready + note-taking abbreviations)
Course / Date / Topic:
Preview questions (before class):
1)
2)
3)
Key idea #1 (slide title or concept):
Main idea (1 line):
Meaning (1–2 lines):
Prof’s add-on (1 line):
Example/application (1 line):
Self-test question:
Key idea #2: (repeat)
3-line summary (after class):
Confusing points to ask about (office hours/discussion board):
Real-life examples (lecture + lab + busy schedule)
Next step: Match your notes to the class type
1) Lecture with dense biology diagrams (Biology, Psych, Econ)
When the instructor explains a visual, write: what the parts are, what changes, and what it predicts. Don’t redraw perfectly—label the meaning. If you’re annotating on a tablet, use quick PDF slide annotation and write one “what it proves” sentence.
2) Lab session (Chemistry or Engineering)
Your lab notebook notes should prioritize: procedure decisions, observed results, and errors. If the TA says, “Most groups mess up step 4,” write that as a warning for future labs (and practical exams).
3) Midterms week + commuting + a part-time shift
If you’re on the bus and your shift starts in 20 minutes, do a “micro-consolidation” to catch up: write the 3-line summary and three self-test questions on your phone. Later, you can expand details from memory—this keeps your study-ready notes moving forward.
7)Common note-taking mistakes (3–6 + fixes)
- Copying and rewriting slides word-for-word. Fix: write meaning + one example instead.
- No questions in the notes. Fix: add three self-test prompts every time (active recall).
- Waiting until the weekend to review. Fix: do the 10-minute finish pass within 24 hours (retrieval practice).
- Writing “too neat” in class. Fix: messy is fine—clarify during consolidation.
- Ignoring confusion. Fix: star it and turn it into an office hours question.
8) Templates/Examples (checklist/study plan/scripts/rubric)
A. 5-point “Study-Ready Notes” checklist (score 0–5)
Give yourself 1 point each:
- I can explain the main idea without looking.
- I wrote at least one instructor add-on per key concept.
- I have at least three self-test questions.
- I noted one example or application.
- I flagged confusing points to ask about.
Score guide:
- 0–2: You have a record, not study notes. Consolidate today.
- 3–4: Solid. Add one more example and test yourself.
- 5: Ready for retrieval practice and spaced repetition.
B. 20-minute review plan (use for exam revision)
- 5 min: cover your notes and answer your self-test questions
- 10 min: fix gaps + add one new example from memory
- 5 min: write three flashcard-style prompts (Q on front, answer on back)
C. Script to ask a focused question in office hours
“On the section about ___, I understand ___. I’m stuck on ___. Could you walk me through one example and how it might be tested?”
9) Brief comparison table (ONLY if relevant; otherwise omit)
| Slide situation | Write this | Skip this |
|---|---|---|
| Definition slide | Your own words + a “trap” note | Copy-pasted definition |
| Process/steps slide | Steps + what each step accomplishes | Full paragraph explanation |
| Data/chart slide | What it shows + conclusion + why it matters | Redrawing the entire chart |
| Example slide | The example + what it illustrates | Decorative story details |
10) Key Takeaways (5–7 bullets)
- Preview the material so class feels like “round two,” not “round one.”
- Capture what the instructor adds: meaning, emphasis, and examples.
- Consolidate within 24 hours with a summary and self-test questions.
- Write for future-you: what helps you answer questions without the screen?
- Use active recall and retrieval practice instead of rereading.
- Turn confusion into specific office hours questions.
11) FAQ (4–6 People-Also-Ask style questions; 2–4 lines each)
Should I print the slides or type notes?
If you get distracted typing, print or annotate digitally with a stylus. If you type fast and stay focused, typing works—avoid copying and prioritize meaning.
What if the professor posts the slides after class?
Take notes anyway. Your notes should capture explanations, emphasis, and examples—the parts that won’t appear on the posted file (slides posted after class still miss the “prof said” details).
How do I take notes when slides are mostly images or graphs?
Write what the image proves and what to notice (trend, relationship, conclusion). Add the instructor’s interpretation in one clean sentence.
Is it okay to use AI tools to summarize slides?
As a starting point, yes—but you still need your own self-test questions and examples—learning sticks when you practice recall, not when you collect summaries.
How many slides should I write notes on?
Not all of them. Aim for key concepts—often the slides the instructor spends time explaining, revisits, or uses to solve a problem.
12) conclusion (use focus keyword once naturally)
Good notes aren’t about capturing everything—they’re about capturing what will help you think during an exam. If you preview, capture what’s added in lecture, and consolidate quickly, you’ll spend less time rereading and more time remembering. That’s the real win when you’re figuring out how to take notes from PowerPoint slides.
Related Articles
Timeline Notes for College Students: How to Study Chronological Topics More Clearly
If dates, events, and cause-and-effect details keep blending, Timeline Notes can help. This method turns messy information into...
Best Note Taking Methods for Students: 10 Proven Picks
Best note taking methods can help students learn faster, stay organized, and remember information more effectively. However, the...
Note Taking During Lectures: What to Write vs What to Skip
If you’ve ever looked down mid-class and realized you’ve been typing everything—yet you still don’t understand it—you’re not...
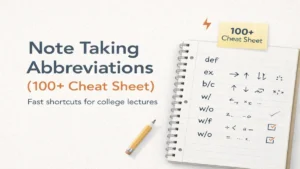
Note Taking Abbreviations (100+ Cheat Sheet)
If lectures move faster than your hand can keep up, handwriting isn’t the problem—your shorthand is. Use these...
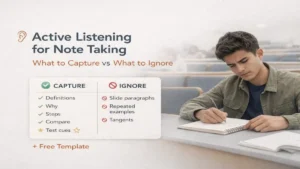
Active Listening for Note Taking: What to Capture vs What to Ignore (Lecture Cues + Checklist + Free Template)
If you’ve ever left a lecture with three pages of scribbles and zero understanding, the problem usually isn’t...

How to Take Notes in Computer Science: The Code–Concept–Complexity (C3) System + Free Template
If you’ve ever left a CS lecture with pages of scribbles but still couldn’t solve the homework, you’re...